What’s all this layering I do? Normally, I just count the layers that show up in my software and tell you: 6 layers, or 100, however many separate files I loaded into Photoshop, that’s the answer.

But what I actually do with the layers is a bit more than a number. Let’s take a recent collage sketch to start with, here. I load it into Photoshop as the first image. Then, I think about what it might need. Just as with paint, collage, or other manual processes, I respond to what I think is missing or needs a tweak. In this case, color. Definitely more color!
I wonder what some more pink would do? I see some pink elements in the map and the drawn lines — maybe more of that. Then I look through other scanned or built images for a likely candidate. How about this big blob of pink I painted one day?

Yes, that will do nicely. I load this second layer into Photoshop separately, remove the outer sections of unpainted paper with a quick erasing tool, and now I have a big patch of pink to pretend I’m painting with. I drag it on top of the collage base, and it all but obliterates it. This is the default definition of a new layer: show it as is (Normal) at 100%. It blocks out the collage underneath.
My next step is to change the coverage amount to around 50%. That lets me see the layer underneath, and decide what this new layer is bringing to the party. Then, it’s time to try a few blending options. Here are the ones that caught my interest this time:


At this point, there are 2 layers, combined in some way. Even though there was a fair bit of tweaking to decide just HOW they were combined, that’s how I count it.
My choice to move forward with? Darken. I like the look overall, but I still have some tricks I can try.
First: do I want 50%? Or would more, or less be better? On the left: 25% darkened; on the right: 75%; drag the slider to compare for yourself.


Next up — do I want ALL of that layer to impose on the base layer? If not, I can now add a layer mask.

I think of layer masks as a piece of paper, inserted between my elements. I can now paint on the new layer, but it’s a reverse, or masking choice: anything I paint as black gets removed from the image. I thought it might be nice to see more of the textured beige paper: it doesn’t need to be quite so pink. I paint out on the layer mask so the beige paper emerges, and that count as another layer. We’re up to 3.
Finally: a buried option, to blend only under some specific conditions. Scott Kelby just wrote up this dialog box I’d never looked at before, and I am smitten! See his article here.
Now, I have yes, even more options. Did I mention I like a lot of options? But even I am getting overwhelmed here.
Here’s what I can do: decide if the layer should be blended depending on the values in the top layer OR the bottom layer. So, I could leave off the lights or darks in a layer, or exclude them from below. Wow.
And here’s what I tried: just blend where the bottom layer, the collage, is NOT white. I think this needs another comparison slider. Look at just the pink on the map sections, and drag the slider:

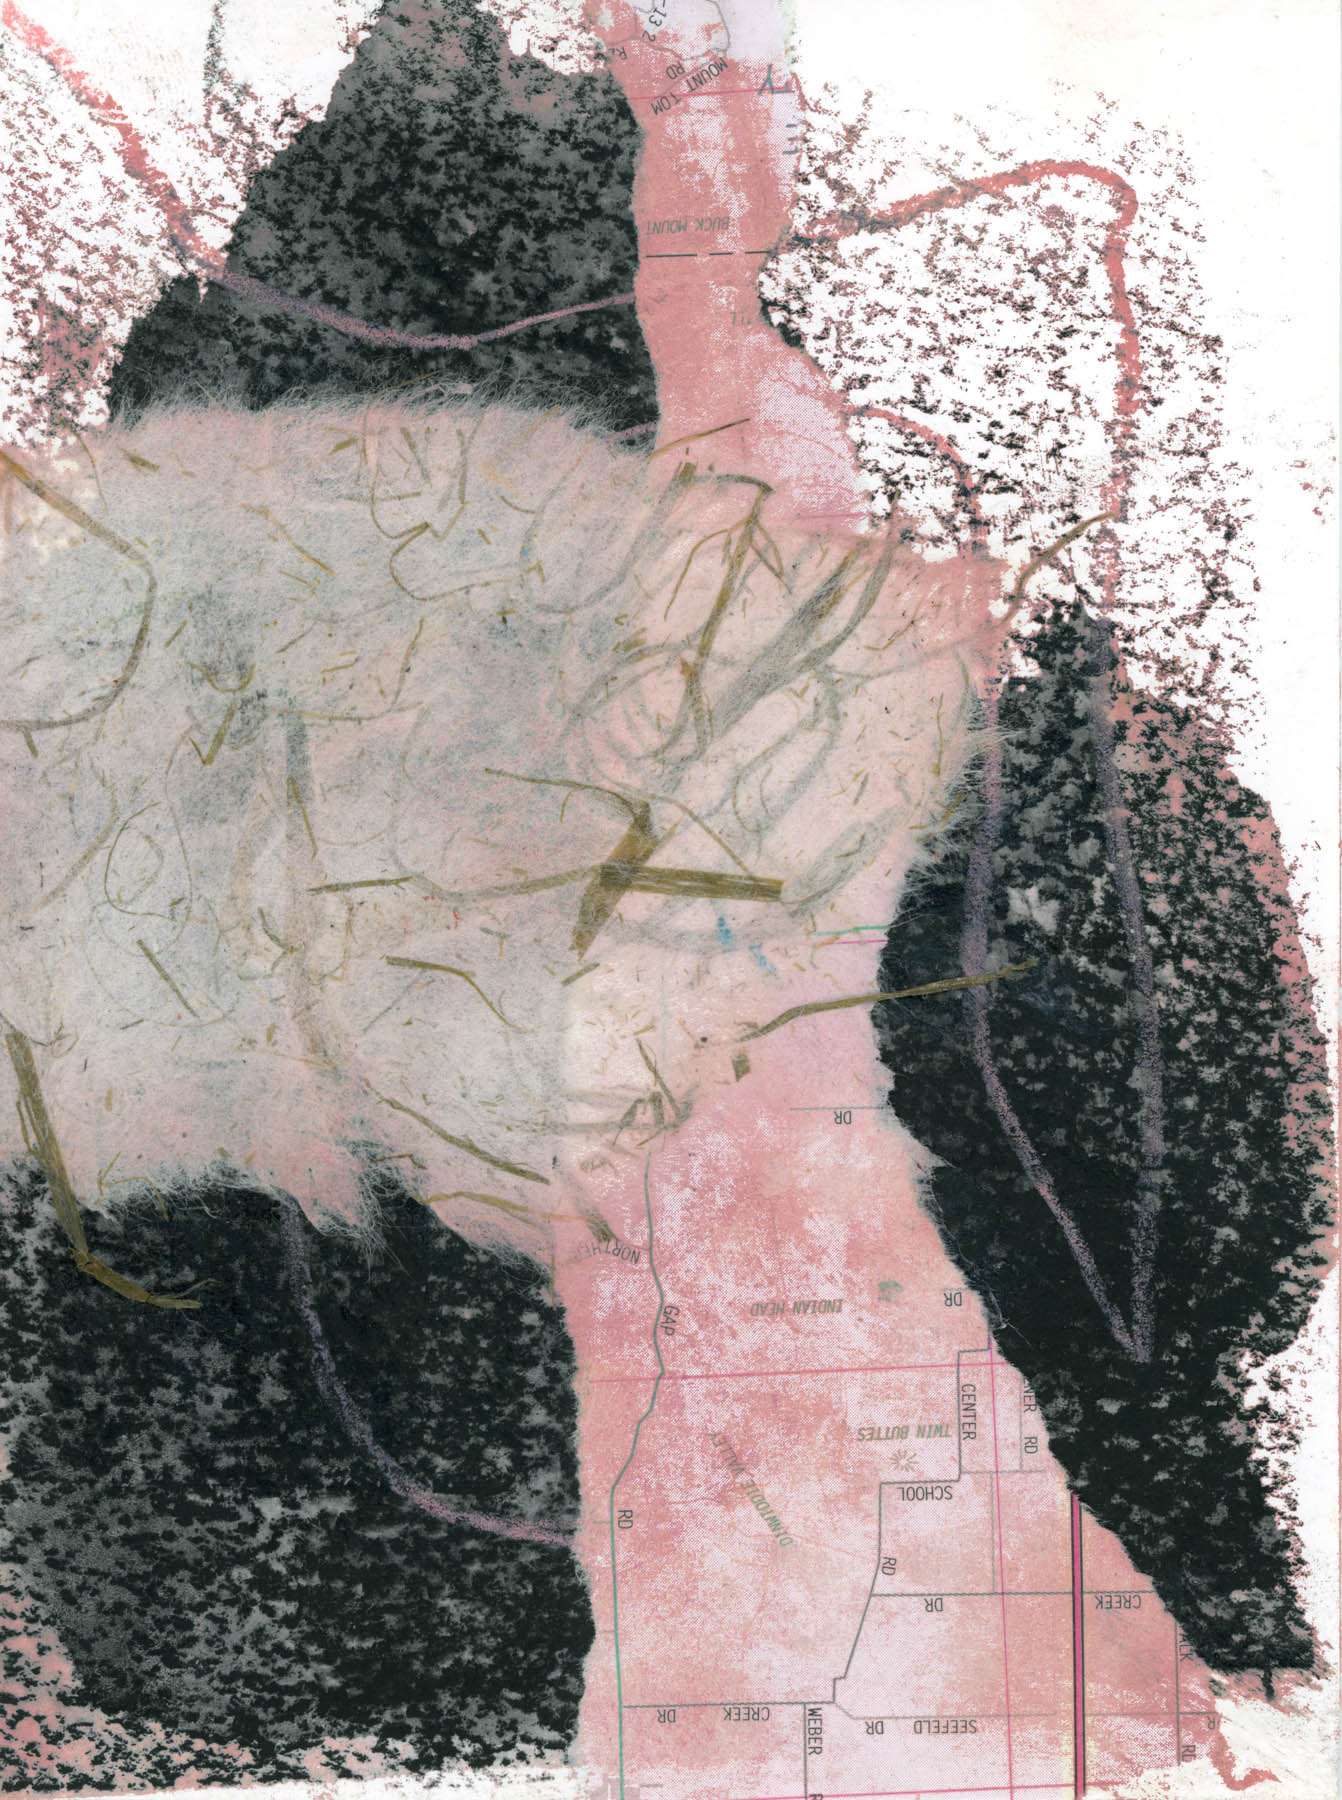
See all that beautiful texture? That conditional dialog, the Blend If section of the Blending Options dialog, does that. Now, I have an image with more color, but with my original hints of color preserved.

The only remaining question is: how many layers is it? If I look at my record inside Photoshop, I see the base layer, the pink layer, the layer mask, and… a little overlapped square icon. Hunh. Is that 3, or 4?
I dunno. It feels like the work of another layer, but it’s not a separate piece I can turn on & off, like these other elements.
I’m thinking I’m not going to count it. If I were using this combination in another piece, I’d call it like this: digital collage, 3 layers. Yep, that looks right. But now you know more about all the decisions that go with each layer: not just a number!
One Comment Add yours